Training Center Omnicast VR
Installation and Usage Instructions
Don't miss a step, they are all important. Follow them in numerical order.
VR Headset Preparation
One-time setupBefore you begin, make sure your headsets are ready to use.
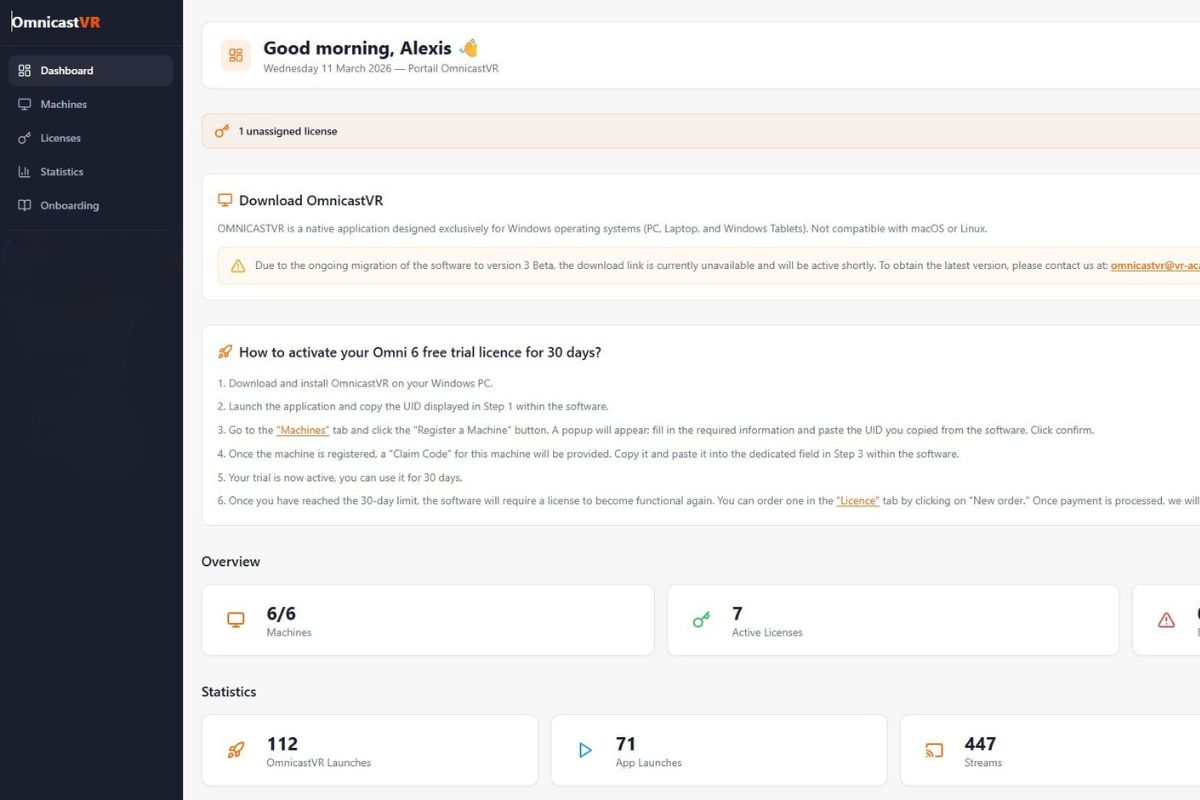
Headset Settings
There is nothing to do for Pico and HTC headsets. For Meta Quest headsets, in the "Settings" tab, enable developer mode. For Meta Quest: enable "MTP Notifications and/or USB Debug". In the "Power" tab, set sleep/screen off to 4H.
Headset Settings
There is nothing to do for Pico and HTC headsets. For Meta Quest headsets, in the "Settings" tab, enable developer mode. For Meta Quest: enable "MTP Notifications and/or USB Debug". In the "Power" tab, set sleep/screen off to 4H.
Disabling the Proximity Sensor

Place a sticky cover over the sensor located between the two lenses inside the headset. This option allows you to test streaming on multiple headsets without learners. If the sensor detects nothing, your stream will display a black screen until it detects a presence and turns on the display.
Disabling the Proximity Sensor
Place a sticky cover over the sensor located between the two lenses inside the headset. This option allows you to test streaming on multiple headsets without learners. If the sensor detects nothing, your stream will display a black screen until it detects a presence and turns on the display.
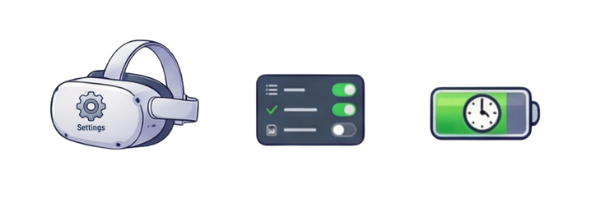
Connecting Devices to the Same WiFi (Local/Internet)
Connect the headsets and the PC to the same WiFi network so they can communicate with each other and Omnicast can serve as a remote control. The network can be an internet or local network. It doesn't matter as long as the devices are connected to the same network.
Connecting Headsets to the Software
Required at every session startConnect your headsets to OmnicastVR to control them from your computer.
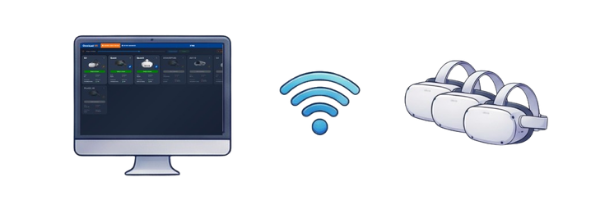
Connecting the Headset to the PC
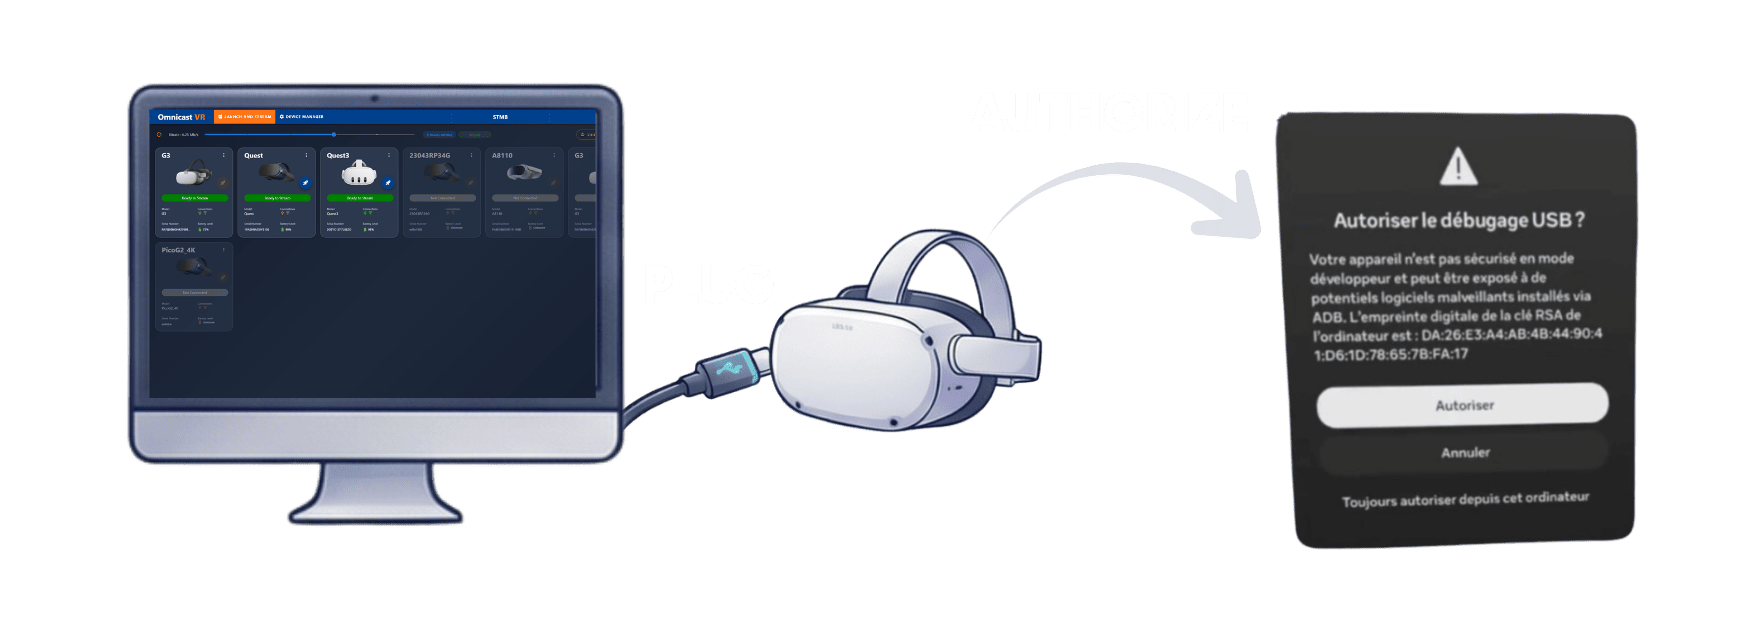
Open the OmnicastVR software on your PC. Connect your headset to the PC via a USB-C cable (data). For meta Quest headsets, a popup will appear in your headset: click "Always allow" so it will never ask again.
Connecting the Headset to the PC
Open the OmnicastVR software on your PC. Connect your headset to the PC via a USB-C cable (data). For meta Quest headsets, a popup will appear in your headset: click "Always allow" so it will never ask again.
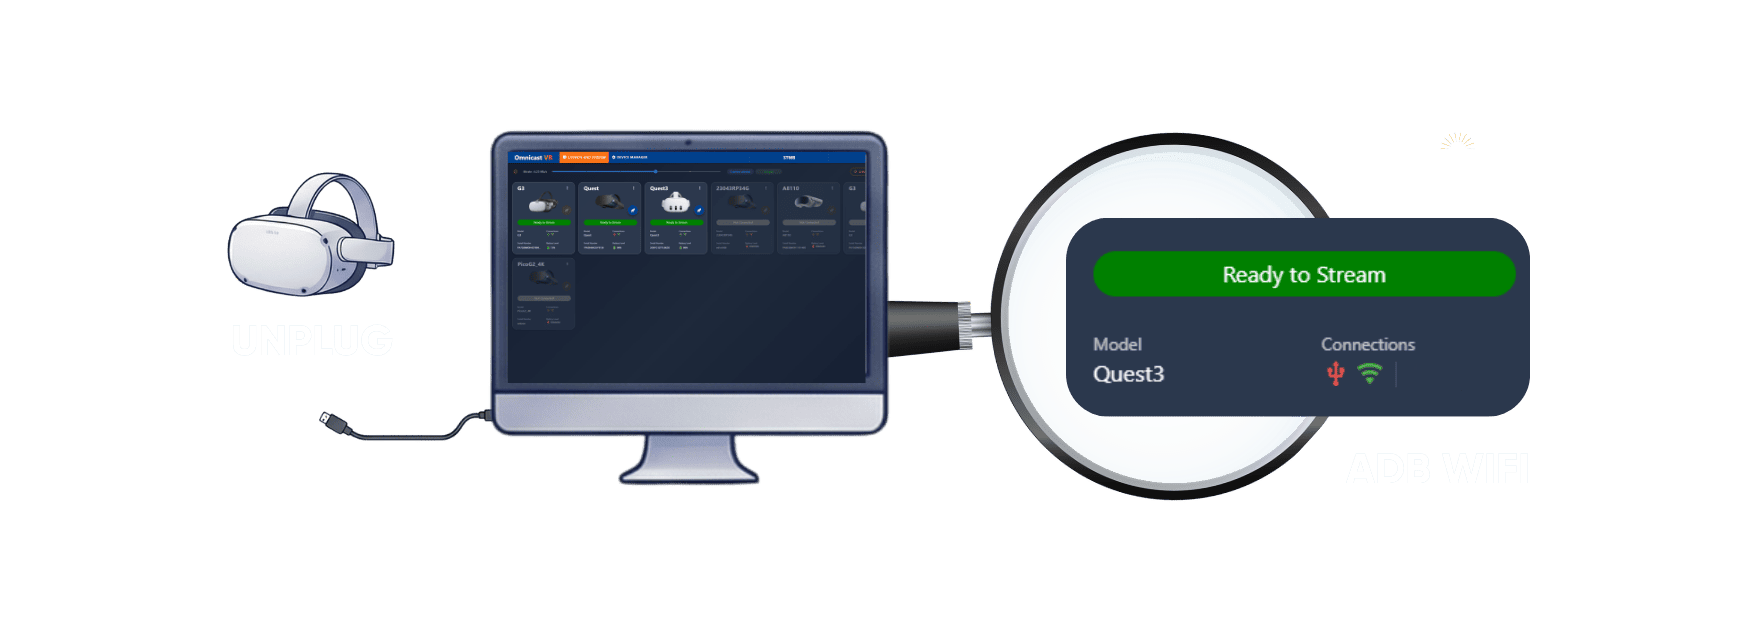
Status Verification

In the software, make sure the "Wired" and "WiFi" connection icons are green. This connection process takes between 5 and 10 seconds maximum per headset. Use the "refresh" button if needed. If everything is green, move to the next step.
Status Verification
In the software, make sure the "Wired" and "WiFi" connection icons are green. This connection process takes between 5 and 10 seconds maximum per headset. Use the "refresh" button if needed. If everything is green, move to the next step.
Switching to Wireless Mode
Disconnect the USB-C cable from the headset, the WiFi icon should remain green and the main button should display "Ready" in green as well. You can now control your headset remotely. Repeat the same procedure with each of your headsets.
Switching to Wireless Mode
Disconnect the USB-C cable from the headset, the WiFi icon should remain green and the main button should display "Ready" in green as well. You can now control your headset remotely. Repeat the same procedure with each of your headsets.
Using OmnicastVR
You're ready! Broadcast content and control your headsets in real time.
Rename Your Headsets
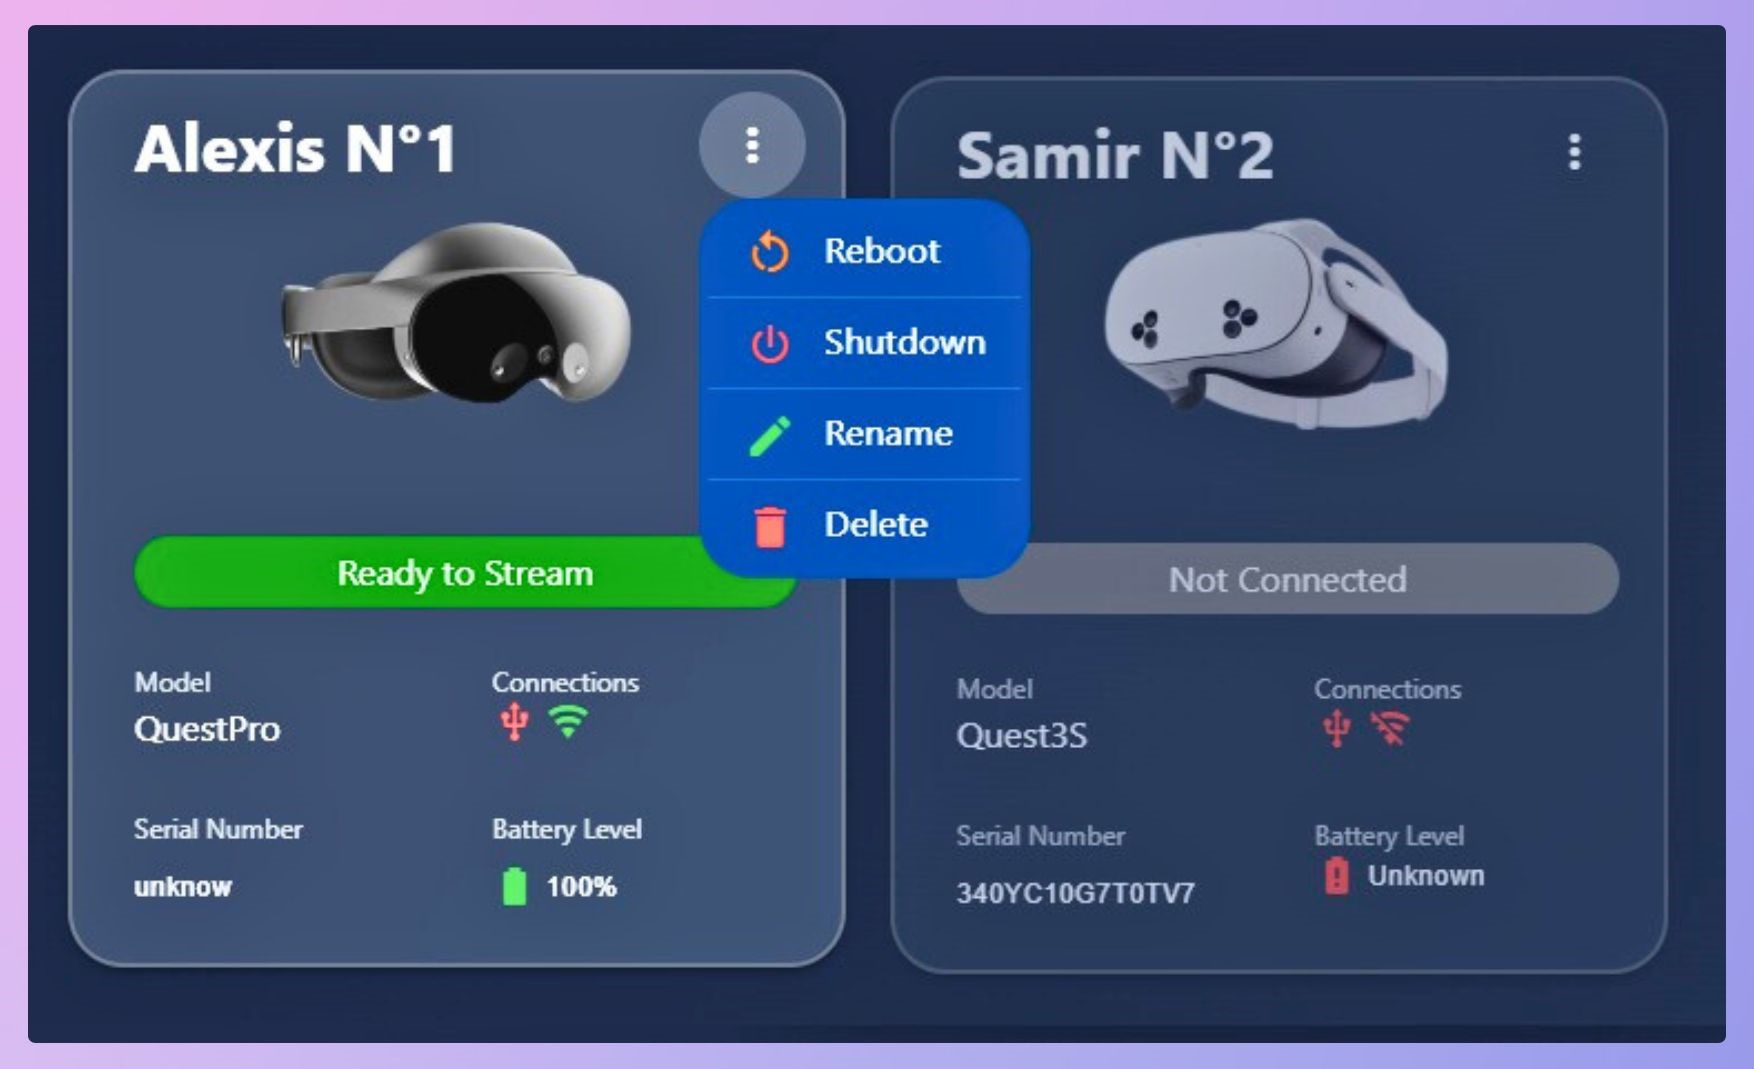
You can rename your headsets, either one by one in the headset card via the three dots or in the DEVICE MANAGER. #Tip: name your headsets with numbers and print the number on a sticker on the headset so at a glance you can tell which stream comes from which headset.
Rename Your Headsets
You can rename your headsets, either one by one in the headset card via the three dots or in the DEVICE MANAGER. #Tip: name your headsets with numbers and print the number on a sticker on the headset so at a glance you can tell which stream comes from which headset.
Select the Headsets to Operate
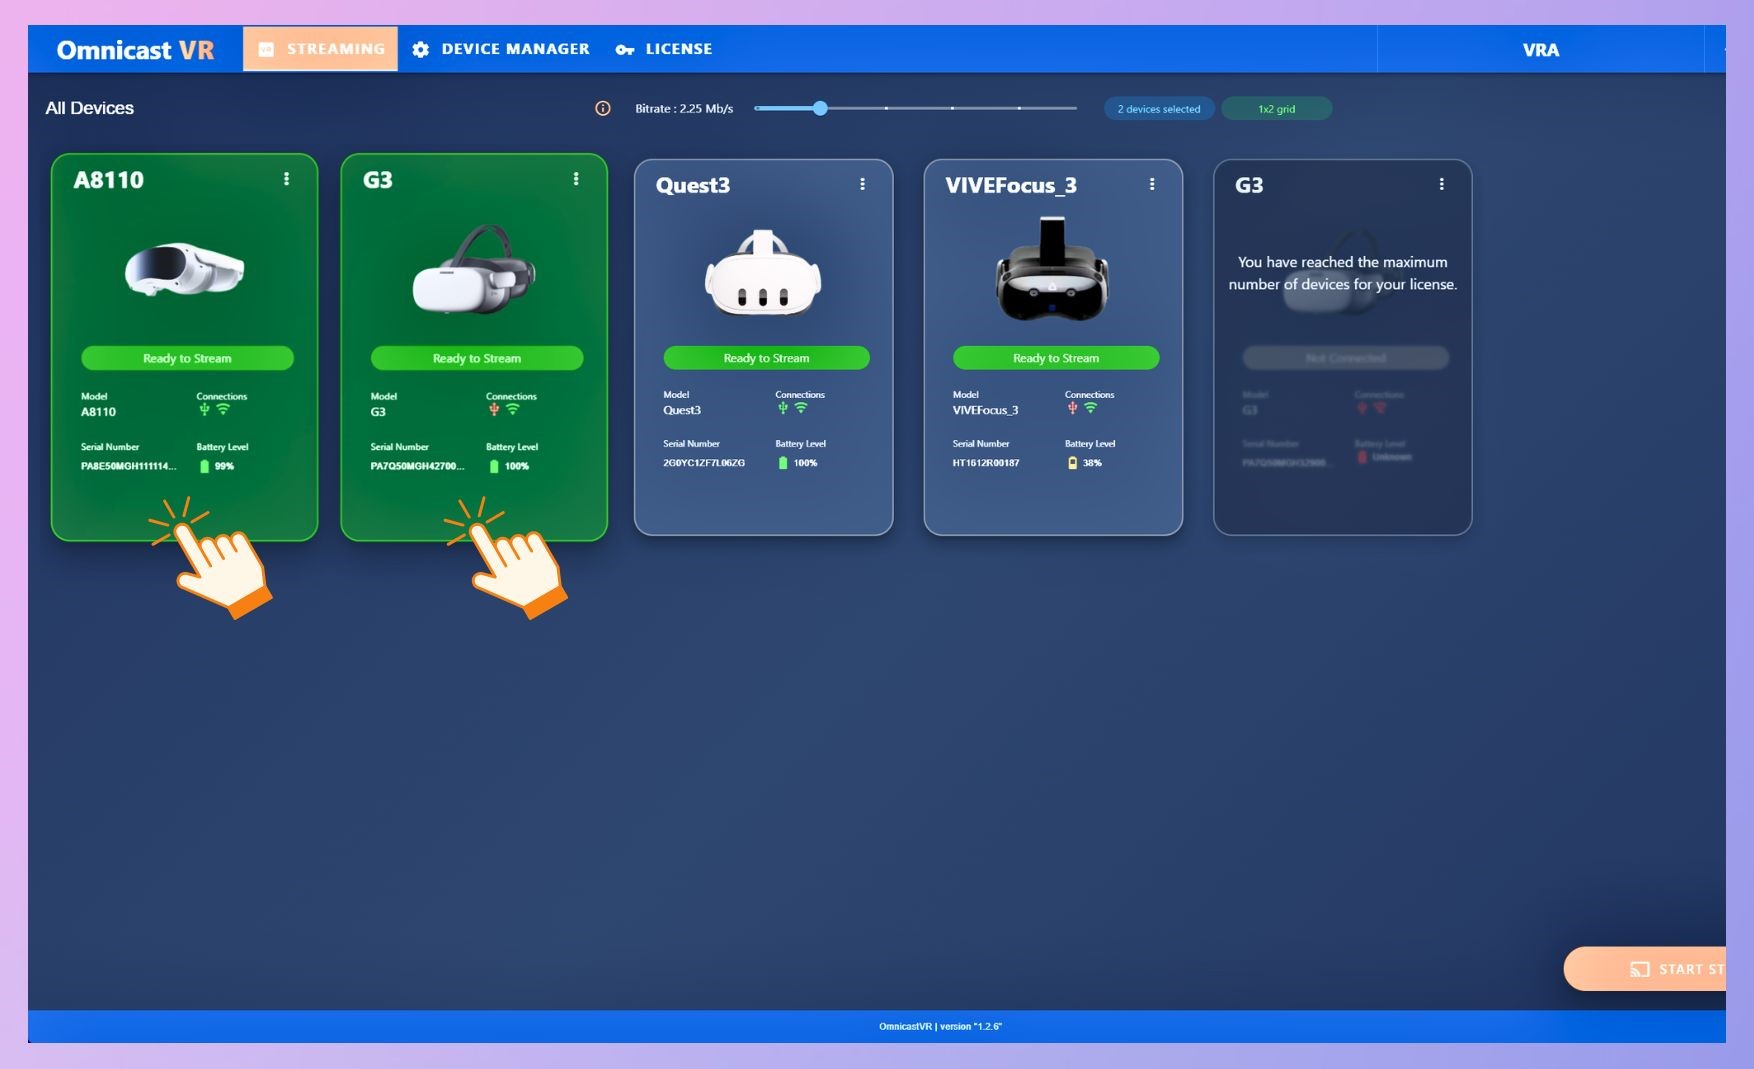
Click on the headset cards with "ready" status, they turn green and the "Launch" and "Stream" buttons appear at the bottom right. The Launch button allows you to launch content on all selected headsets synchronously. The Stream button lets you start streaming from the selected headsets.
Select the Headsets to Operate
Click on the headset cards with "ready" status, they turn green and the "Launch" and "Stream" buttons appear at the bottom right. The Launch button allows you to launch content on all selected headsets synchronously. The Stream button lets you start streaming from the selected headsets.
Start and monitor Headset Streaming
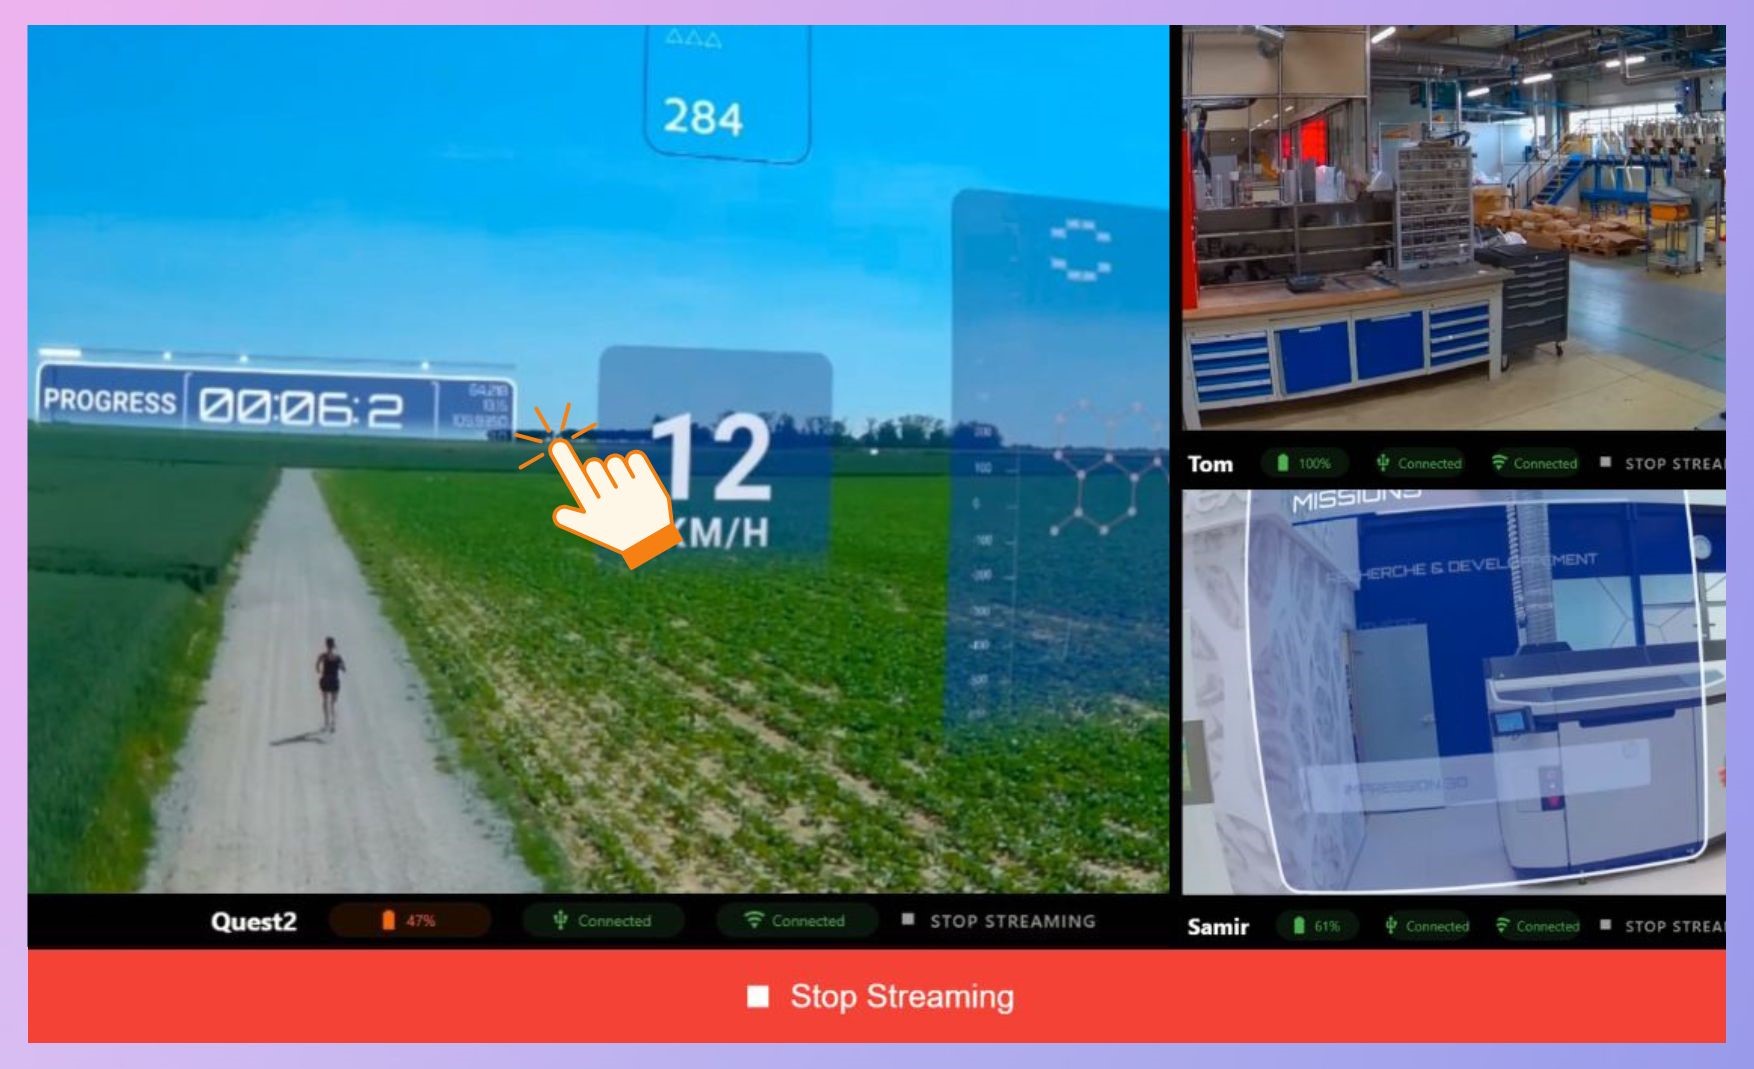
Once your stream is running, you can click on each headset stream and zoom in, control the volume, restart or stop an application without affecting the other headsets. If you want to stop all streaming, use the button: STOP STREAMING.
Start and monitor Headset Streaming
Once your stream is running, you can click on each headset stream and zoom in, control the volume, restart or stop an application without affecting the other headsets. If you want to stop all streaming, use the button: STOP STREAMING.
Launch apps individually or sync to all headsets

From the streaming window, you can control app launches for each headset individually or globally using the "Launch All" button. To launch your applications, please ensure they have been selected in the Device Manager / App Selector beforehand.
Launch apps individually or sync to all headsets
From the streaming window, you can control app launches for each headset individually or globally using the "Launch All" button. To launch your applications, please ensure they have been selected in the Device Manager / App Selector beforehand.
Save Time at the End of a Session
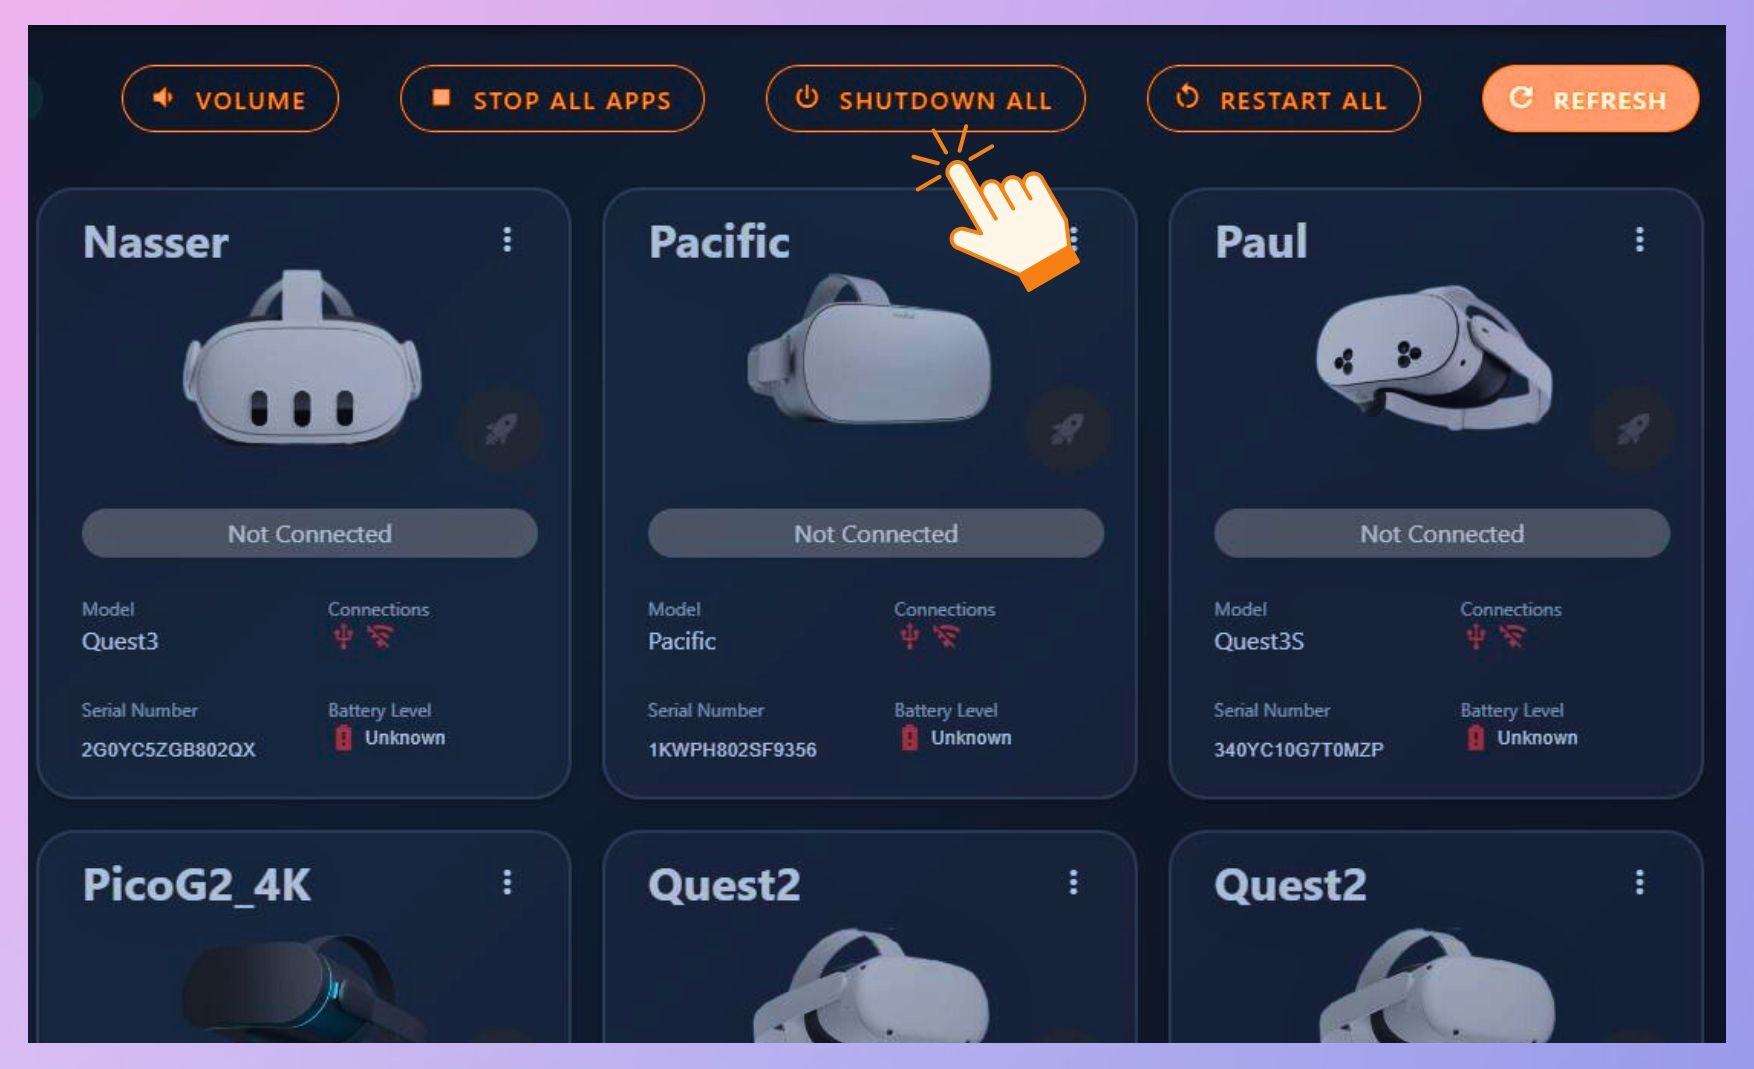
At the end of a session, use the global buttons located at the top: STOP ALL APPS to stop all programs in the headsets, then SHUTDOWN ALL to turn off all headsets remotely.
Save Time at the End of a Session
At the end of a session, use the global buttons located at the top: STOP ALL APPS to stop all programs in the headsets, then SHUTDOWN ALL to turn off all headsets remotely.
Our Learning Guides
Follow these tutorials in order to quickly master Omnicast VR
Your progress
0% completed(Each video = 13%)

Omnicast VR Demonstration
2 minutes to understand how it works and the benefits of the solution.
Support and Frequently Asked Questions
FAQs on Installation and Activation
Filtrer par catégorie
FAQs on Software Usage
Filtrer par catégorie
Share Your Experiences
Exchange with other users and discover new ways to use Omnicast VR
Technical Support
Get prompt assistance from our expert team via email: support@omnicastvr.com. Priority support is available for all Pro License clients.
Early Access
Be the first to know about new features and updates
Setup & Installation Articles


Customer Portal Sign In
Customer Portal Sign In
Sign in to manage, order, and activate your OmnicastVR subscriptions.